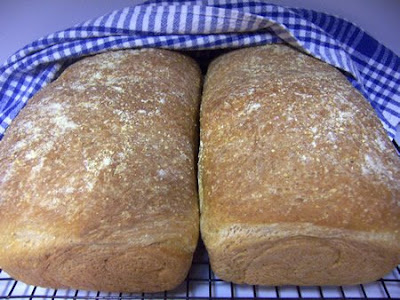
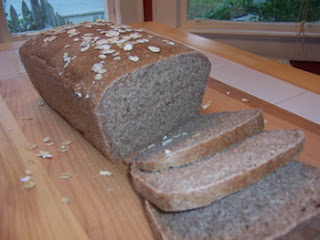
Sunday 31 May 2009

Making Bagels: BBA Challenge

It's Day 3 of the Bread Baker's Apprentice Challenge! Today, we're making bagels. You can make any flavor you like but I decided to make the cinnamon raisin bagels - yummy!

This bagel recipe uses the sponge technique to give the bagels a better flavor and texture. It also helps the bagels to freeze and thaw better. This method takes 2 days due to the extended fermentation time and the time needed to retard the bagels in the refrigerator before baking, but it's definitely worth the extra effort to fit it in your schedule.

I've made bagels before using a different recipe and technique and I wasn't too impressed. However, I really like the method outlined in the Bread Baker's Apprentice. It's easy and the bagels taste great!

For a different type of bagel that uses a variation of this formula,
check out Sourdough Bagels on My Mind.
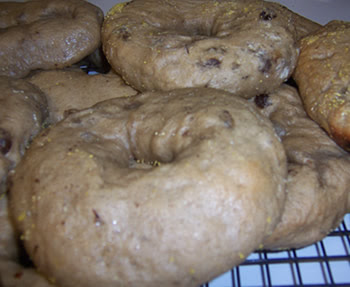


    "According to folklore, bagels were invented in seventeenth-century Austria as a tribute to the wartime victories of King Jan of Poland, and were modeled after the stirrup of his saddle. They were a bread for the masses, popular also in Germany and Poland, but they were introduced into the United States by German and Polish Jewish immigrants, so we think of them as a Jewish bread. Now, because of the softer steamed versions, bagels have once again become a bread for the masses." -- Peter Reinhart The Bread Baker's Apprentice.


Let's get baking!

If you're following along with us, refer to page 115 in the
Bread Baker's Apprentice. In this section, Peter Reinhart provides a very good commentary on different techniques for making bagels. I didn't realize how many different schools of thought there are for making bagels. I just know I like them.


The Sponge


The dough


Shaping the bagels


Retarding the bagels in the refrigerator

You can check to see if the bagels are ready to be retarded in the refrigerator by using the "float test". Fill a small bowl with cool or room-temperature water. The bagels are ready to be retarded when they float within 10 seconds of being dropped into the water.

Take one bagel and test it. If it floats, immediately return the test bagel to the pan, pat it dry, cover the pan, and place it in the refrigerator overnight (it can stay in the refrigerator for up to 2 days). If the bagel does not float, return it to the pan and continue to proof the dough at room temperature, checking back every 10 to 20 minutes or so until a tester floats. The time needed to accomplish the float will vary, depending on the ambient temperature and the stiffness of the dough.

My test bagel floated within 10 seconds. It was pretty cool!


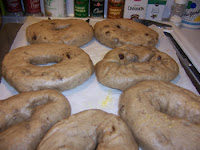
Bagels after being retarded in refrigerator overnight.


Ready to bake the bagels


Let the bagels cool on a wire rack for 15 minutes or longer before serving.


Thanks for joining us this week in the Bread Baker's Apprentice Challenge.


Stay tuned for Day 4 of the Bread Baking Challenge:

Next time, we'll be making Brioche. Depending on which version you want to make, you'll need plenty of eggs and butter. I've made the middle-class brioche before and it was so rich, I'm going to try the Poor Man's Brioche this time.


Happy Baking!
Cathy

    No Knead Four-Grain Pot Bread

    This pot bread utilizes a combination four types of grains: cornmeal, rolled oats, rye flour and all-purpose or bread flour so it has a very interesting texture. It is a rustic, crisp-crusted pot bread, that has a light color and a subtle, grain taste that goes with most anything.


    This Four-Grain Pot Boule is from Kneadlessly Simple by Nancy Baggett.

    It is a very easy bread which requires no kneading, but takes a couple of days to make due to the longer fermentation time needed to develop the flavor and texture of the bread. Even though the entire process takes two days, don't let that scare you...it just requires a little bit of planning to allow for the longer rising times. The dough is resting (fermenting) for most of that time.

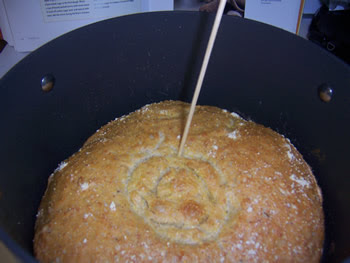
    I started the process yesterday and finished the loaf today.  I enjoyed making this bread. Nancy’s process is similar to the other no knead baking process, but she uses ice cubes which I find very interesting. My pot was a bit big for the bread, but it worked okay. I stuck a skewer in it to make sure it was done.


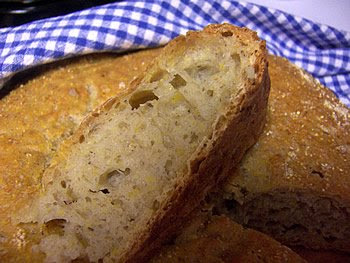
    The loaf tastes good warm with butter but it cuts better when cooled.  I like the bits of grains speckled throughout the crumb.


    If you want to maintain the crisp crust, store in a large bowl draped with a clean tea towel or in a heavy paper bag. Or store airtight in a plastic bag or foil. The crust is a little too crunchy for me so I plan to store it in a plastic bag so the crust will soften up a little.


    Happy Baking!
    Cathy

    Wednesday 27 May 2009

    Greek Celebration Bread: BBA Challenge

    The bread of the day for the Bread Baker's Apprentice Challenge, is Greek Celebration Bread. This is an enriched bread made from a master formula that utilizes a wild-yeast starter or a poolish.


    Several different breads can be made from the master formula: Greek Celebration Bread, Christopsomos, and Lambropsomo. I chose to make the basic bread. 

    The formula uses a wild yeast starter, along with a little commercial yeast, to create an authentic-tasting, yet manageable, bread. If you don't have a starter, you can replace it with an equal amount of poolish. The fermentation and proofing times remain the same. I chose to utilize the poolish method.

    If you're interested in learning how to make a different type of Greek Celebration Bread,
    check out this Greek Easter Bread.


    Day 1: Prepare the Poolish
     

    Make the poolish the night before and put it in the refrigerator until you're ready to use it. Or, if you want to make the bread the same day, do what I did and start the poolish in the morning before work (7:30 am) and make the bread after work. 

    Here is what the poolish looks like after fermenting at room temperature for several hours. You can see it's bubbly and foamy. I think it's really cool the way that works!


    Evening Day 1: Prepare the Dough and Bake the Bread

    Here is the big beautiful loaf in the oven.  I just love that big ball.


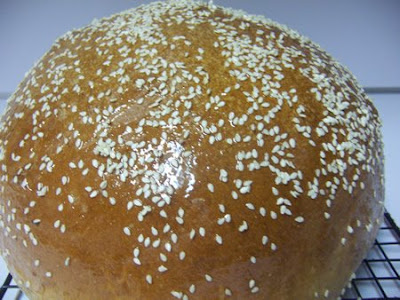
    Here is the finished loaf cooling on a wire rack. It's huge and beautiful! I probably should've made two loaves, but from the way this looks, I don't think it will last long anyway.


    I brushed the loaf with a sugar/water glaze as soon as it came out of the oven.


    Then I sprinkled the loaf with sesame seeds.


    Here is the sliced loaf. I was right! It is delicious! My son likes it too! Definitely won't last long.


    Thanks for joining us this week in the Bread Baker's Apprentice Challenge.

    Stay tuned for Day 3 of the Bread Baking Challenge. Next time, we'll be making bagels.

    Happy Baking!
    Cathy

    Thursday 21 May 2009

    Anadama Bread: BBA Challenge

    The Bread Baker's Challenge has begun!  The first bread we made in the challenge is Anadama Bread.


    Anadama bread is a yeast bread composed of wheat flour, cornmeal, and molasses. It originated in Boston.  --- Source: http://www.foodtimeline.org/foodbreads.html#anadama
      "Anadama bread. A bread made from cornmeal and molasses. The term dates in print to 1915, but is probably somewhat older. If it were not for the frequency of their citation, it would be difficult to believe the story most often cited is of a Gloucester, Massachusetts, fisherman's wife named Anna, who gave her husband nothing but cornmeal and molasses to eat every day. One night the fisherman got so angry, he tossed the ingredients in with some yeast and flour and made a bread in the oven while muttering to himself, "Anna, damn her!" A more affectionate story has a New England sea captain referring to his wife with the same name expletive as a phrase of endearment. This Anna was apparently adept at bread-baking, and she became well known for her cornmeal-and-molasses loaf among the fishing crews who appreciated this long-lasting, hearty bread. There was, supposedly, a gravestone to this legendary woman that read, Anna was a lovely bride, but Anna, Damn'er, up and died. One source contends that a commercial bakery called its product Annadammer or Annadama bread." ---Encyclopedia of American Food & Drink, John F. Mariani [Lebhar-Friedman:New York] 1999 (p. 6)

    This version of Anadama bread takes 2 days to make from start to finish. However, don't let that intimidate you. The process is really rather simple. The only thing you do on day one is prepare the soaker. It takes about 5 minutes to mix the ingredients together and then you're done. How easy is that!
      "A soaker, is a type of pre-ferment that does not include yeast. It is usually a coarsely milled whole grain such as cornmeal, rye meal, or cracked wheat, that has been soaked overnight in water or milk. It's purpose is to activate the enzymes in the grains in order to break out some of the trapped sugars from the starches. It also softens the coarse grains. " ---Source: The Bread Baker's Apprentice by Peter Reinhart.
       

     The Soaker


     The sponge


    Oven spring while the loaves are baking.


    Oh boy! This is good. You've got to try it.  I took a loaf of this bread on a camping trip.  It made a fabulous PB&J sandwich!


    Thanks for joining us this week in the Bread Baker's Apprentice Challenge.


    Stay tuned for Week 2 of the Bread Baking Challenge:

    Next week, we'll be making a Greek Celebration Bread. You have your choice as to which bread you want to make. Keep in mind that this bread uses a barm or poolish so you'll need to allow enough time for the process. If you don't already have a sourdough starter, you can make the barm (on page 230) or the poolish (on page 106). I have some sourdough starters, but I might just try the poolish method since the barm method takes a little while to start.


    Happy baking!
    Cathy

      Wednesday 20 May 2009

      The Bread Bakers Challenge

      A group of bread bakers around the world answered the call to bake all of the breads in Peter Reinhart's The Bread Baker's Apprentice. The Bread Experience joined with them in this crazy adventure. There are 43 breads in the book and we baked one bread every week. Each bread is unique and offers a different level of bread baking experience. We shared our progress each week in this blog.

      This is how it started: http://pinchmysalt.com/2009/05/14/the-bread-bakers-apprentice-challenge-has-begun/.

      The challenge is over, but I had fun baking all of the breads in the book.  It was a wonderful experience baking along with other bakers around the world.  A big thanks to Nicole of pinchmysalt for starting the challenge.

      Check out my Bread Baker’s Apprentice Challenge archive to see all 43 of the breads

      Happy baking!

      Cathy

      Saturday 16 May 2009

      Whole Grain Country Bread in Clay Baker

      This whole grain country bread is baked in a clay baker. The recipe is based on whole wheat flour, but can be adapted to different grains (barley, rye, oats, spelt), as long as one-half of the mixture is wheat flour to ensure a light, airy texture. For this loaf, I’m using whole wheat flour milled from hard red winter wheat in a WonderMill Grain Mill.

      This is a very easy and delicious whole wheat bread. It tastes great toasted with butter and/or jam or as a peanut butter and jelly sandwich or however you prefer. It is even better the next day.


      Whole Grain Country Bread

      Makes: 1 large loaf

      Adapted from The History of Bread by Bernard Dupaigne.


      Ingredients:
      • 2 T active dry yeast
      • 2 cups lukewarm water
      • 5 cups whole wheat flour
      • 1 1/2 teaspoons salt
      • 1 tablespoon vegetable oil (or melted butter), plus additional
      • 2 tablespoons oats or sunflower seeds for decoration


      Directions:

      1) In a large bowl, dissolve the yeast in 1 cup lukewarm water. Combine the flour and salt. Gradually stir into the yeast, along with the remaining water, and oil or butter. Mix thoroughly and work the dough vigorously; it will seem sticky and too wet at first, but the whole wheat flour will gradually absorb the extra moisture as the mixture is kneaded.

      2) Transfer the dough to a work surface and continue kneading for 10 minutes. The dough is pretty wet so I used a dough scraper to assist

      3) Roll into a ball, coat with oil, and replace in clean bowl.  Cover with plastic wrap (or a damp cloth) and let rest 2 hours at room temperature.

      4) Place the dough on a floured work surface, punch it down, and knead it for a few minutes.

      5) Press the dough into a rectangle. 

      6) Fold the dough a third of the way down toward the middle and bring the bottom third up. Overlap the dough to form an envelope shape.

      7) Pinch the seam closed and roll it a bit with the heels of your hands to even it out.

      8) Place in a large greased loaf pan seam-side down. I used a glazed clay baker. 

      9) Cover with damp cloth and let rise 40 to 60 minutes at room temperature, or until double in volume.

      10) Preheat the oven to 350º F. 

      Note: I used a clay baker in a gas oven, so I placed the baker in the cold oven and set the temperature to a low setting first, then gradually increased the temperature to 350º F so the clay baker wouldn't crack.

      11) Sprinkle the dough with the oats or sunflower seeds and bake for about 30 to 40 minutes. The bottom of the bread should sound hollow when thumped lightly.

      12) Let cool on a wire rack.


      The finished loaf sliced and ready to eat.


      I brought it over to my friend's house to test. It was really good. Just ask him.


      Happy Baking!
      Cathy 


      Sunday 10 May 2009

      Flower Pot Bread

      I thought it would be fun to make Spring Flower Pot Bread using earthenware clay pots as molds. Even though I used an easy and basic yeast bread, once the bread is baked in the flower pots, it makes a whimsical presentation for a Mother's Day brunch or for any special occasion.


      Preparing the clay pots for baking:

      Before you can use clay pots for baking bread, the pots need to be tempered. The method I used is a little different than the instructions in the recipe, but I found that baking the pots a little longer helped temper them better.

      Be sure to use food-grade clay pots:

      Brush clean, new pots liberally inside and out with oil and place in a hot oven (about 400°F) for about 30 minutes. For convenience, you can do this while you're cooking something else. Repeat this process several times until the pots are impregnated with oil. They can then be used for baking bread and will need very little greasing. "BREAD: The breads of the world and how to bake them at home" by Christine Ingram and Jennie Shapter.

      Flower Pot Bread
      Makes: 3 loaves


      "Flower Pot Bread on Spring Menu," Amy Vanderbilt, Los Angeles Times, May 29, 1969 (p.F8)

      I found the recipe on the Food Timeline http://www.foodtimeline.org/foodbreads.html#flowerpot)

      Ingredients:

      • 2 cups milk
      • 3 tablespoons sugar
      • 3 tablespoons shortening
      • 3 teaspoons salt
      • 1 cup lukewarm water
      • 2 teaspoons sugar
      • 2 envelopes dry yeast
      • 6 cups sifted flour
      • Melted shortening (or cooking spray)


      Directions:

      1) Wash and thoroughly grease three red clay flowerpots 5-inch wide and 5-inch deep. Bake pots at 375 deg. 5 to 10 minutes. Repeat the process. (Or, follow the process listed above)

      2) Scald milk in saucepan. Remove from heat and add 3 tablespoons sugar, shortening and salt. Stir until shortening is melted, then cool to lukewarm. Combine lukewarm water, 2 teaspoons sugar and yeast, then stir in 4 cups flour and beat well. Add remaining flour and mix well. This is a sticky dough.

      3) Transfer dough to a lightly greased bowl and brush the top with melted shortening (or spray with cooking spray). Cover with waxed paper (or plastic wrap) and towel and allow to rise in a warm place until doubled, about 30 to 45 minutes. I covered my dough with plastic wrap then a towel and let is rise on the counter.

      4) Turn dough onto lightly floured surface and knead lightly. Divide dough into three equal parts and place in well-greased flower pots.

      Even though I tempered the pots really well, I still find it helpful to grease them before placing the dough in them. The bread usually comes out clean this way.

      5) Cover the pots with plastic wrap and let the loaves rest in a warm place until doubled in bulk.

      6) Bake at 375 degrees F. for 35 to 40 minutes.

      I put the pots on a baking sheet to bake.  When the tops started to brown, I tented them with foil to keep them from burning.  I baked the loaves for about 35 minutes then tested them with a skewer to make sure they were done.

      7) Let the finished loaves cool in the pot for about 10 – 15 minutes before removing to a wire rack to cool completely.  This helps prevent the loaves from tearing when you remove them from the pots.


      Serve in pots using real or fake flowers "growing" from them.


      I put the loaves back in the pots to serve since they make such a pretty presentation. I gave one to my mother and one to my sister and kept one for myself. The bread is actually very tasty. It tastes great with butter or jam.


      Happy Baking!
      Cathy