Showing posts with label white bread. Show all posts

Thursday, 30 July 2009

English Muffin Bread: BBA Challenge

It's Day 12 of the BBA Challenge and we're making English Muffins. At the request of my taste tester and my sons, I'm making English Muffin Bread instead of muffins. I must say that this bread is really good! It's made with buttermilk so there is a little bit of a tangy flavor. Mmmmm...so glad I made the loaf instead of the muffins.
 
I'm participating in a Group Bake next weekend and one of the breads is English Muffins so I'll get another opportunity to make the muffins. Yummy!

If you're following along with us in the Bread Baker's Apprentice turn to page 157 to locate the recipe and list of ingredients.

English Muffin Bread


Mixing the batter

Stir together the flour, sugar, salt, and yeast in the bowl of an electric mixer. You can mix it by hand if you prefer. Mix in the shortening and 3/4 cup buttermilk until the ingredients are thoroughly mixed and form a ball.

I had a little loose flour left in the bowl so I dribbled a little more buttermilk into the mixture. The dough should be soft and pliable, not stiff.


Kneading the Dough

Knead the dough using the dough hook for about 8 minutes. Sprinkle in more flour if necessary to make a tacky, but not sticky dough.


First Rise:

Transfer the dough to a lightly oiled large bowl and roll it over a couple of times to coat it in oil.


Cover the bowl with plastic wrap and let the dough ferment at room temperature for 60 to 90 minutes.


Shaping the Loaf:

Wipe the counter with a damp cloth and transfer the dough to the counter. I sprinkled the counter with flour so I could shape the loaf.


If you're making the English Muffin Bread instead of muffins, shape the loaf as shown below:

Roll out the dough into a rectangle. Then roll the dough into a log.


Pinch the seams together. Turn the dough seam down. Lightly oil a 8 1/2 by 4 1/2-inch loaf pan and place the loaf in the pan.


Second Rise:

Mist the top of the loaf with cooking spray and loosely cover with plastic wrap. Proof the dough for 60 to 90 minutes, or until it nearly doubles in size.


Baking the Loaf

Preheat the oven to 350 degrees F.  Using a serrated knife,score the loaf down the center and rub a little vegetable oil into the slit.


Bake the loaf for 35 to 45 minutes, rotating 180 degrees halfway through for even baking. I rotated the bread after about 15 minutes. The tops should be golden brown and the sides should also be golden. The loaves should sound hollow when thumped on the bottom.


Cooling the Loaf

Remove the loaf immediately from the pan and cool on a wire rack for at least an hour before slicing or serving.


Serving the Loaf

The beautiful golden loaf is ready to be eaten. I think I’ll have a slice. This bread tastes great as a grilled cheese sandwich.


Thanks for joining us in the Bread Baker's Apprentice Challenge. Next time, we'll be making Focaccia. Oh boy! I can't wait for this one!

Happy Baking!

Cathy

Wednesday, 1 July 2009

No Knead White Sandwich Loaves

Today, we're making easy no knead white bread loaves. We'll make one loaf of sandwich bread, and use the other piece of dough for no knead cinnamon sticky buns. This recipe is also from Kneadlessly Simple by Nancy Baggett.


Is something wrong with the flour?

I figured out that at least part of the issues I've been having with the no knead breads is the flour ratio. I have kitchen scales, but I've been trying to use tools that most home bakers would have on hand. Therefore, I've been using my measuring cups instead of weighing the flour and then adjusting the flour to water ratio as needed. I've gotten used to the feel of the dough of traditional yeast breads so that has been working well so far.

However, no knead breads are a little bit different since you're not kneading the dough - duh! After the mishap with the ciabatta, I decided to weigh the flour. I know, I know, why didn't I just do that before? Well, all I can say is that old habits are hard to break. Plus, I love bread baking for the art. I know the science is important but I didn't want to get that geeky about it.

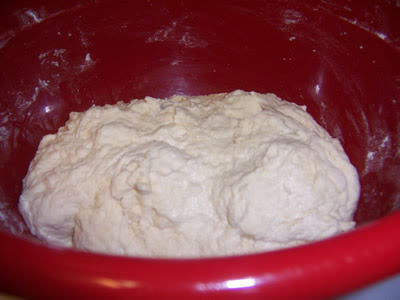
Well, I decided it was time to get geeky - actually I guess I already had, I was just in denial. So I weighed the flour and as it turns out, my favorite measuring cup only holds 4 oz of flour. So for recipes that call for 3 cups of flour (ciabatta, for example), the actual weight is 12 oz. However, the weight specified in the recipe is 15 oz - a difference of 3 oz. For this easy white bread recipe, the weight specified in the recipe is 32.5 oz for 6 1/2 cups of flour. However, my 6 1/2 cups of flour only weighs 26 oz. From now on, I will be weighing the flour for these no knead breads.


This is what 32 1/2 oz of flour looks like


Are you ready? Let's get baking!

If you would like to bake along with us, turn to page 29 in Kneadlessly Simple to locate the recipe and list of ingredients.


Easy No Knead White Bread
Makes: 2 loaves (we'll make one loaf and use the rest of the dough for sticky buns)


Mixing the dough:

In a large bowl, mix together the flour, sugar, salt, and yeast.  In a measuring cup, whisk the oil into the water. Stir this mixture into the flour scraping down the sides until the mixture is thoroughly blended.


If the mixture is too dry, add additional water, a little bit at a time; however, don't over-moisten it because the dough should be stiff. Or, if it's too soft, add a little extra flour. I didn't have to adjust the flour/ratio at all this time. It's very humid here.

Brush or spray the top of the dough with oil.  Cover the bowl with plastic wrap and refrigerate the dough for 3 to 10 hours.


Then let the dough rise at cool room temperature (about 70 degrees F.) for 15 to 20 hours. If convenient, stir the dough about halfway through the rise.


The timing and temperature seem to be the trickiest part of this no knead method. I like the long fermentation process but you do have to plan a little bit. It's very hot outside and I don't keep my temperature too cool inside (definitely not 70 degrees in the summer). I've been letting the dough rise at about 80 degrees F. I usually start the process at night and let the dough rest in the refrigerator all night. Then it sits on the counter all day. I'll have to try these recipes in cooler weather to see the difference.

I stirred the dough down after 15 hours, then let it rest a few more hours.


Dough after resting an for a few more hours on the counter.


Note: To fit in with my schedule, I made the sticky buns one night and put the rest of the dough back in the refrigerator until the next night.

I transferred the dough to a clean bowl and put it in refrigerator.
The next day, a few hours before I was planning to bake the bread, I let the dough rest on the counter to warm up to room temperature before doing the rest of the steps listed below.


Shaping the loaves: (continued from the day before)

Stir the dough very vigorously and add more flour if necessary.


Then, cut the dough in half and place the portions in two well-greased 8 1/2 x 4 1/2-inch loaf pans.

I'm making no knead sticky buns with half of the dough so I'm only making one loaf of bread. I had already separated the dough so didn't need to do that for this step.


Press the dough into the pans using a well-oiled spatula.


Spray the top of the dough with cooking spray.  Make a 1/2-inch deep slash lengthwise down the center of the loaf.  Cover the loaf with plastic wrap sprayed with oil.


Second Rise:

For a regular rise, let the dough rest at warm room temperature for 1 1/2 to 2 1/2 hours until the dough nears the plastic.


Then remove the plastic and continue until the dough reaches 1/2 inch above the pan rims.  Dust the loaf evenly with 1 tablespoon of flour.


Baking the bread:

15 minutes before baking time, place a rack in the lower third of the oven and preheat to 425 degrees F until the top of the loaf is nicely browned.  Then, reduce the oven to 400 degrees and bake for 35 to 45 minutes. Bake for 15 to 20 minutes longer, until the tops a well browned and a skewer inserted in the thickest part comes out with just a few crumbs on the tip. Cover the top of the loaf with aluminum foil to prevent over browning, if necessary.


Bake for 5 to 10 minutes more longer to ensure the centers are baked through. At this point, my bread was done. I didn't need to bake it an additional 5 to 10 minutes.


Cooling the loaves:

Cool in the pan on a wire rack for 10 minutes, then turn out the loaf or loaves onto racks and cool thoroughly.


Serving and storing:

Cool the loaves thoroughly before slicing or storing.  I placed a tea towel over the loaves and let them cool for about an hour. 


Store in an airtight plastic bag or wrapped in aluminum foil. The bread will keep at room temperature for 2 to 3 days, and may be frozen, airtight, for up to 2 months. I don't think this bread will stay around very long so no need to worry about storing.


Thanks for visiting The Bread Experience Bread-Baking Blog. We hope you'll join us next time when we make no knead cinnamon swirl bread.


Happy Baking!
Cathy

Sunday, 10 August 2008

White Velvet Batter Bread

This savory batter bread requires no kneading. It fills the kitchen with a wonderful aroma while its baking. It is a unique bread that was developed for baking in coffee cans to create a special mushroom shape.
 
 
It is an easy yeast bread which is suitable for a beginning baker. However, it's fun to make regardless of your baking level.

I like this bread because it is quick to make. It
can be prepared in 2 hours from mixing to table. If you don't have time to prepare a kneaded bread, this is a good alternative because it rises once, then bakes.
 
Batter breads require no kneading so the process is quicker than for regular bread doughs and it is easier to clean up -- a definite plus. For more information, check out this section on no knead breads.


White Velvet Batter Bread

From Beth Hensperger's Bread Made Easy: A Baker's First Bread Book
 
Special equipment needed:Two 13-ounce coffee cans or two 4 1/2-inch diameter ovenproof glass baking canisters.


Ingredients:

  • 1 tablespoon (1 package) active dry yeast
  • 3 tablespoons firmly packed light brown sugar (I didn't have light brown sugar so I substituted dark)
  • 1/4 teaspoon ground ginger
  • 1/2 cup warm water (105°F to 115°F)
  • 1 can (12 ounces) evaporated milk, regular, fat-free, or goat's milk, undiluted, at room temperature
  • 2 teaspoons salt
  • 2 tablespoons walnut oil or unsalted butter, melted
  • 4 1/4 cups (exact measure) unbleached all-purpose flour

Directions:


Step 1: Mixing the Batter
In a small bowl, sprinkle the yeast, a pinch of the brown sugar, and the ginger over the warm water. Stir to dissolve and let stand until foamy, about 10 minutes.


For this recipe I’m providing the instructions for making the batter by hand. I got a good workout because you have to beat the batter vigorously. If you prefer, you can let your mixer do the work for you.

Combine the milk, the remaining sugar, salt, oil or butter, and 1 1/2 cups of the flour in a large bowl.
Beat vigorously with a balloon whisk or dough whisk, at least 40 strokes by hand, until thick and sticky. Add the yeast mixture and beat vigorously for 1 minute more.


Continue to add the remaining flour gradually, 1/2 cup at a time, then beat vigorously another 100 strokes, about 2 minutes. By this time, I had switched to using the Danish dough whisk because the batter was too thick to use the balloon whisk. The batter will stay sticky. Scrape down the sides of the bowl with a spatula.


Step 2: Panning and Rising
Generously grease the bottom and sides of the coffee cans or glass baking canisters.
Divide the batter evenly between the 2 molds, filling one-half to two-thirds full.


Use a spatula to push the batter into the corners and smooth the top with flour-dusted fingers. Cover loosely with plastic wrap lightly greased with vegetable oil cooking spray.


Let rise at room temperature until double in bulk, about 45 minutes to 1 hour. The batter should be even with the rim of the pan and slightly lift up the plastic wrap. Do not let the dough rise more than double (over risen loaves collapse during baking).


Tip: If the batter over rises, scrape it into a bowl, beat vigorously about 20 strokes, then return it to the pan and begin the rising process again.


Step 3: Baking, Cooling, and Storage

About 20 minutes before baking, place the oven rack in the lower part of the oven and preheat the oven to 350
°F (325°F) if using glass molds). Bake until the top is crusty and dark brown, the bread sounds hollow when tapped, and a cake tester inserted into the center comes out clean, 40 to 45 minutes.

An instant-read thermometer should read 200
°F. The crown will dome about 3 to 4 inches above the rim of the mold. Cool in the molds for 5 minutes.

Finished batter breads
As you can see the crowns domed very nicely


Turn mold on its side and slide the loaves out onto a rack to cool on their sides for at least 2 hours. Serve slightly warm, sliced into thick rounds or cut into long wedges, with lots of butter.

There wasn't that easy! Don't wait too long to eat the bread after it cools, it is really good!


Storing the bread:
Store wrapped in a plastic food storage bag (or bread bag) at room temperature for up to 3 days or in the freezer for up to 2 months.


Happy Baking!
Cathy