Today we're making No Knead English Muffin Loaves using the Kneadlessly Simple method. These English Muffin Loaves are delicious! They are crispy on the outside, and light and airy on the inside. They make great toast!
This is the last bread we'll be making in this series of No Knead Breads. I really like the Kneadless Simple method of making bread and will definitely try some more of these breads in the future.
If you would like to bake along with us, turn to page 45 in Kneadlessly Simple to locate the recipe and list of ingredients.
English Muffin Loaves
Preparing for the First Rise
In a large bowl, stir together the flour, sugar, salt, and yeast until thoroughly mixed. In a measuring cup, whisk or stir together the oil and ice water. Vigorously stir the ice-water mixture into the dough.
Scrape down the sides and mix until the ingredients are thoroughly blended. If the mixture is too dry, add additional water, a little bit at a time. Or, if necessary, add a little extra flour until it forms a fairly soft dough. I added a little extra flour.
Spray the top of the dough evenly with cooking spray. Tightly cover the bowl with plastic wrap.
For enhanced flavor, refrigerate the dough for 3 to 10 hours. The dough after refrigerating it for 5 1/2 hours.
Then let the dough rise at cool room temperature for 12 to 18 hours. I don't have a cool room temperature but I let it rest on the counter anyway to develop the flavor.
If possible, stir the dough vigorously once during the rise. Here is the dough a little while after stirring it down. Look how bubbly it is!
This is the dough after resting on the counter for 15 hours.
Preparing for the Second Rise
Stir the powder milk into the dough. Then vigorously stir in enough more flour to yield a very stiff dough.
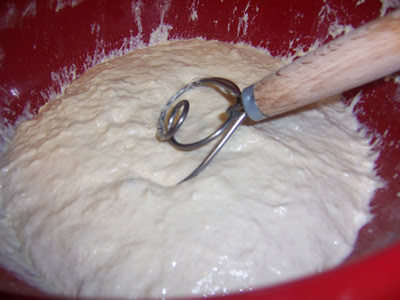
I switched to the dough whisk to make sure the dough was completed mixed.
Grease two loaf pans (8 1/2 x 4 1/2-inch) and sprinkle them with cornmeal.
Using well-oil kitchen shears or a serrated knife, cut the dough in half and place the portions in the pans. The dough was really wet so I used a dough scraper. However, at this point, I should've put the dough in the refrigerator to let it firm up a bit, then I could've used shears to cut it.
Brush or spray the tops with oil, then smooth out the surface and press the dough evenly into the pans. Tightly cover the pans with nonstick spray-coated plastic.
For a regular rise, let the dough stand at warm room temperature 1 1/2 to 2 1/2 hours. Or for an extended rise, refrigerate the loaves in the pans, covered, for 4 to 24 hours, then set out at room temperature to finish rising.
Because the dough was really wet, I contemplated going with the extended rise in the refrigerator but I wanted to bake the bread sooner so I decided to set it out on the counter for the regular rise instead. I went shopping with my son for a couple of hours and when I got back, the dough had exploded all over the counter. It was really hot and humid in Atlanta so I should've gone with my first thought. You know what they say "Hindsight is always 20/20".
I didn't take a picture of the mess. I was too busy cleaning it up and trying to salvage the dough. I did manage to salvage it. I put the dough back in the bowl and put it in the refrigerator for about an hour. Then, after I got everything cleaned up, I put the dough back in the loaf pans, and covered them with clean plastic sprayed with cooking oil. Then I put the loaf pans back in the refrigerator for the extended rise.
The salvaged dough smoothed and ready to go in the refrigerator overnight.

I refrigerated the dough for about 15 hours. Then I took it out of the refrigerator and let it finish rising on the counter for a couple of hours.
Continue the rise until the dough nears the plastic. Remove the plastic and continue until the dough just reaches the pan rims.
Baking the Loaves
Preheat the oven to 400 degrees F. 15 minutes before baking time and place a rack in the lower third of the oven. Spritz the loaf tops with water. Reduce the oven to 375 degrees F. Bake on the lower rack for 30 to 40 minutes, or until the tops are well browned.
Continue baking for another 10 to 20 minutes until a skewer inserted in the thickest part comes out clean.
Cooling the Loaves
Cool in pans on wire rack for 10 to 15 minutes. Then remove the loaves to the rack and cool completely.
Serving the English Muffin Loaves
Cool completely before slicing or storing.
This bread looks a little funky but I like it - it has character. The dough had three rises instead of two so that's probably why it looks like this. However, it tastes wonderful and the texture is incredible so I'm not complaining.
I had a slice of this bread toasted for breakfast. Then for dinner, I toasted a couple of slices, buttered them and made a fried egg and cheese sandwich. It was delish!
Storing the Loaves
Store in plastic or aluminum foil. The bread will keep at room temperature for 3 days, and may be frozen, airtight, for up to 2 months. I decided to eat one loaf and freeze the other one. I double-wrapped it in plastic and put it in the freezer for later.
Thanks for visiting The Bread Experience Bread-Baking Blog.
Happy Baking!
Cathy


No comments:
Post a Comment